You can easilty select a suitable ANT+ sensor by visiting the ANT+ directory.
Intro
Identifying Bluetooth Serial Ports
IMPORTANT: This is for Bluetooth Classic Pilot devices, even those that also have BLE functionality, (mostly pre-2020).
For BLE devices you do NOT need to do any pairing as covered in this guide.
Devices that are capable of connection to a PC via a programmer cable can be downloaded to directly. Plug in the programmer cable (along with the secondary USB cable if fitted) and then use Windows’s Devices and Printers panel to ascertain which serial COM number has been assigned. Then just set this COM port number in the download window.
Adding Pilot™ as a Bluetooth Device
To download a configuration to a Pilot™ device via Bluetooth Classic (i.e. not BLE) it is necessary to add the device via the Windows “Add Bluetooth Devices” control panel window. Calling up this window varies according to the version of Windows but is normally accessible via the control panel or via the small Bluetooth icon in the system tray.
Ensure the Pilot™ is powered and in-range of the PC and click “Add a device” or the equivalent. Note: The procedure is quicker if the Pilot™ is not connected to other Bluetooth sensors. In Windows 10, select “Add a Bluetooth Device” and choose the type as “Bluetooth”. A range of similar dialogues are used across Windows versions but the differences are just aesthetic.

Select the Pilot device and it will pair within seconds resulting in "Ready to Use" message.
Once Windows reports everything is installed the Pilot™ device will be listed by name in the Bluetooth Devices control panel screen. Right-click on the icon and select “Properties” then the “Hardware” tab. Note: Microsoft make this harder by moving the options each version; on later versions of Windows (e.g. Windows 10/2018+) you may need to find a link on the Bluetooth screen that reads “More Bluetooth Options" as shown below:

In the dialogue that appears titled "Pilot-MUX-45 Properties" click on the "Hardware" tab. Two ports are listed, make a note of the port with "outgoing" as the description - this is the port you must use to download to the Pilot. If you try to use the other port the Embedded Setup program will hang for a considerable amount of time.

Many setups and projects can be improved by monitoring pressure, temperature and humidity. There are a range of sensors that can be used and the Pilot-CAN supports a number of them including the Sensirion SHT range of sensors. There are many other sensor options included in the yellowcog software library. This all makes it simple to add, for example, in cockpit temperature and humidity reading and have these logged by a CAN data logger.
There are many bespoke, Temperature/Humidity and Pressure products, fist check the Temperature (and pressure) Module.

Speed and Cadence sensors connect using ANT wireless communications that are standard in the Pilot range. Speed and/or cadence sensors are normally designed to be mounted on a bicycle; the sensor magnet on the wheel spokes and a sensor on the bicycle frame. By counting the pulses from the passing magnet, the speed the bicycle is traveling can be calculated (the only piece of extra information is the wheel circumference). Other uses include the hand-crank pedestals on racing yachts and any other similar hardware setups.
IMPORTANT: ANT+ certify three different types of Speed & Cadence sensors: Speed; Cadence; and Speed & Cadence. They are not the same ANT+ type but all three are individually supported by yellowcog's Pilot range.
There are large numbers of Speed and Cadence Products on the market but our Speed and Cadence Sensor help should assist with most of them.
You can choose to output any/all of the available data collected by the sensor via the Pilot by your chosen method. Commonly this would be serial, CAN bus or wireless.
If you need any help in choosing a yellowcog product or advice on how to build your next project then just email us.
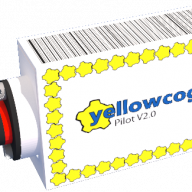
 Yellowcog has an off-the-shelf version of the Pilot-CAN board that has a single, very large, RGB LED mounted on one side. Providing feedback in active situations can be tricky in many circumstances since small displays, or worse, having to check on a smart phone, can be unreliable ways to alert users. The large, bright LED can be seen from 100 metres and react to any parameter or variable available to the Pilot system (e.g. received from the CAN bus or a wireless device). Some examples for the use of the LED are to show: the proximity of a user; the status of a data up-link; physiological stress warnings, remote data values; or warning lights for any available parameter. The LED can pulse or flash in reaction to any parameter so the options are endless. The boards have been used in everything from security access control to art installations.
Some yellowcog products can control external LEDs but we also have a Pilot with a RGB LED and help on RGB LED Module.
 There are three ways that yellowcog provide a "proximity" stream that can be logged or transmitted. Firstly, the Pilot devices collect data only from devices that are in range; for most sport (racing, yachting) this is enough of a measure of proximity. Secondly, a device can be configured to collect the serial number of devices that are near enough to provide data. Since each device has a unique serial number, and if the allocation of devices is known (e.g. each driver in a rally has their own wearable device) then not only is the dataset automatically assignable to each device (e.g. and therefore a driver) but also it provides a record of what (or who) was nearby. In situations where you want to know physically where someone is (say, on a yacht) then there is also a measure of signal strength which allows a relative indication of distance or proximity. Using one or more of these methods, datasets can be automatically annotated with user activity or the location of assets.
See product listing for Proximity Sensor or help on proximity sensors.


